How to Reseal RV Roof?
Resealing your RV’s roof is an essential maintenance task to ensure its longevity and protect against leaks and water damage. Over time, the sealant on your RV roof may degrade due to exposure to the elements. At Onlyroofing, we’ve put together a comprehensive guide on how to reseal your RV roof effectively.
1. Inspect the Roof for Damage
Before applying new sealant, it’s crucial to inspect the roof for any existing damage. Check for cracks, holes, or areas where the old sealant has worn away. Here’s how to do it:
- Visual Inspection: Look for visible cracks or peeling around seams, vents, and skylights.
- Check for Soft Spots: Walk on the roof carefully to spot soft or spongy areas that may need repair.
For more tips on inspection, visit Onlyroofing.
2. Clean the Roof Surface
Cleaning the roof is an essential step before resealing. Dirt, debris, and old sealant can prevent the new sealant from adhering properly. Here’s what you need to do:
- Use a Roof Cleaner: Apply a cleaner designed for RV roofs and scrub away any dirt or grime.
- Rinse Thoroughly: Use a hose or pressure washer to remove all cleaner residues.
- Dry the Roof: Allow the surface to dry completely before proceeding with sealant application.
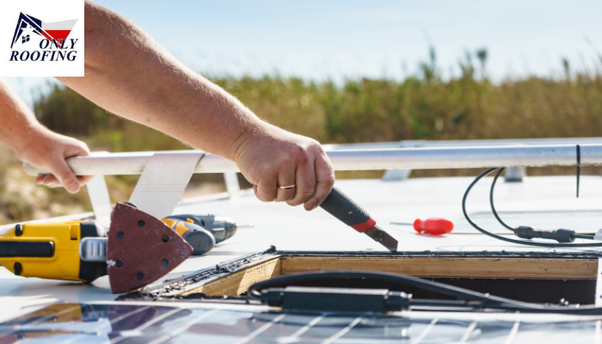
3. Remove Old Sealant
If there is any old, cracked, or peeling sealant, it must be removed before applying the new one. Here’s how to do it:
- Use a Scraper: Gently scrape off old sealant using a plastic scraper or putty knife.
- Clean Residue: Use a cleaning solvent to remove any remaining sealant residue from the surface.
4. Apply New Sealant
Now that the roof is clean and free of old sealant, it’s time to apply the new one. Follow these steps:
- Choose the Right Sealant: Select a high-quality RV roof sealant that’s compatible with your roof material (rubber, fiberglass, etc.).
- Apply Evenly: Use a caulking gun or paint roller to apply a smooth, even layer of sealant to seams, edges, and any other areas prone to leaks.
- Let it Cure: Allow the sealant to cure according to the manufacturer’s instructions before using the RV.
5. Final Inspection and Maintenance
After the sealant has dried, perform a final inspection to ensure complete coverage. Regularly check your RV roof and reseal it every 1–2 years to maintain protection.
For additional tips on RV roof maintenance, visit Onlyroofing.
Read More:


Comments
Post a Comment